
How To Make Milk Kefir Cheese Super Easy!
Kefir cheese is so easy to make! If you make milk kefir regularly you will notice how the milk thickens.
If you leave it long enough you will have the solids separate from the liquids which is known as curds and whey.
I personally love to make kefir cheese and use it in a variety of different ways which I will list below. But first let’s find out how to make this deliciously soft easy probiotic rich cheese!

This post contains affiliate links, which means I make a small commission at no extra cost to you. See my full disclosure here.
Health Benefits Of Milk Kefir
Milk kefir is loaded with probiotics and nutrients your body needs. It has a large range of health benefits, is thick and creamy. Some of the health benefits milk kefir is known for is its anti-inflammatory properties.
- Milk kefir can help to support healthy strong bones.
- Help to support a strong immune system.
- Can help to reduce blood pressure.
- Can help to restore gut health and improve your digestion.
There are more benefits of drinking or eating milk kefir products if you want to have a look online!
What You Need
There are a few things you will need in order to make kefir cheese.
Cheese cloth or Nut milk bag I actually prefer nut milk bags because they have the string so I can hang them easier. You can also use a very clean pillowcase if that’s all you have on hand!
Large bowl to catch the whey in.
Sea Salt (Australian Brand)- American brand Sea salt. I prefer using sea salt as its rich in minerals and pure. The salt helps to draw out more moisture from your cheese making it harder and also helps to preserve the cheese longer.
Milk Kefir Cheese Recipe
- The first step to making milk kefir cheese is to make milk kefir. If you don’t know how to do this, I have an article explaining how to do it here! How To Make Homemade Milk Kefir And Its Benefits
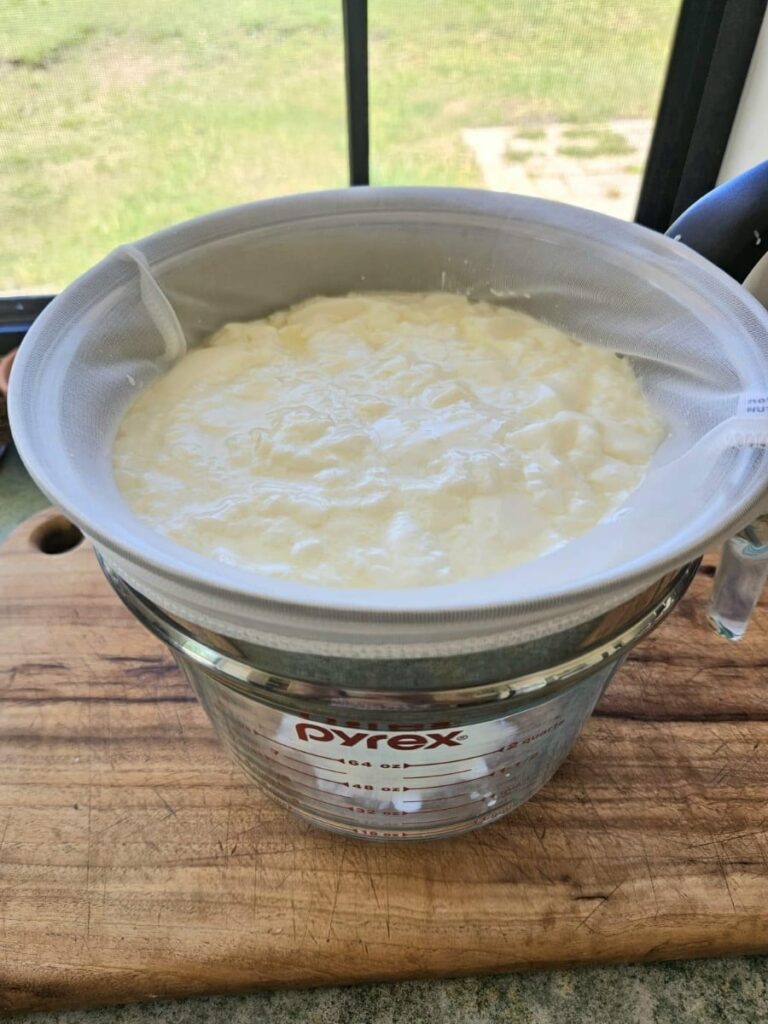
2. Once you have strained out the grains from your fermented milk you will want to pour the thickened milk into a cheese cloth, milk bag or a very clean washed pillowcase will do.
3. Afterward either tie up the corners of the cheese cloth or tighten the strings of the milk bag. Then you will hang it up, so the liquid starts to strain out leaving the solids behind.
4. Have your cheesecloth or milk bag hanging over a large bowl or pot to catch the whey. You will want to save this whey as it is very nutritious and can be used for many things which I will list farther down below.
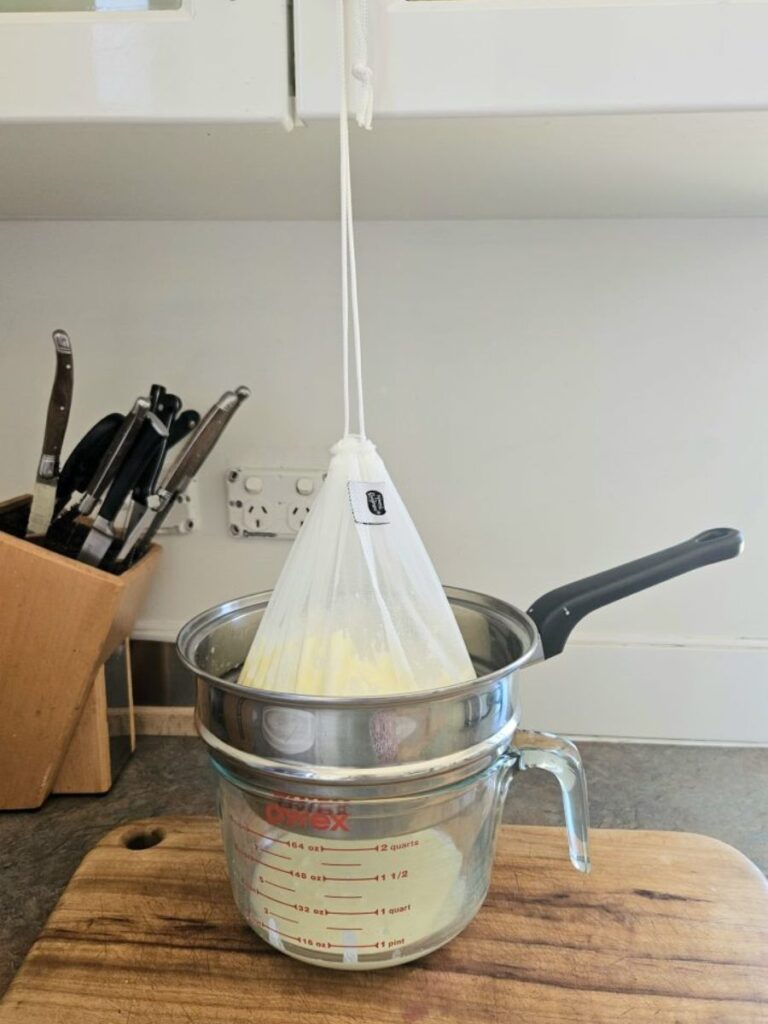
5. Let it hang for about 24 to 48 hours. The longer it hangs the thicker your cheese will become. I normally hang it for 24 hours at room temperature for a softer cheese.
6. If you want a thicker harder cheese, I recommend mixing a tablespoon of salt into your cheese after 24 hours. Then rehang it for a further 24 hours. Afterwards your cheese should look like the picture below.

7. Take the cheese out of the cloth or milk bag and place into a container. You can use it as is or turn it into a dip or dream cheese which I have listed below.
8. This will store in a container in the fridge as is for a solid week but can last longer if you turn it into dream cheese.
How To Use Kefir Cheese?
- Use it as a cream cheese substitute for any recipe wanting cream cheese. It’s excellent for making cheese cakes or lathering on bagels!
- Turn it into a delicious dip! Mix it with whatever spices you like to make either a savoury or sweet dip!
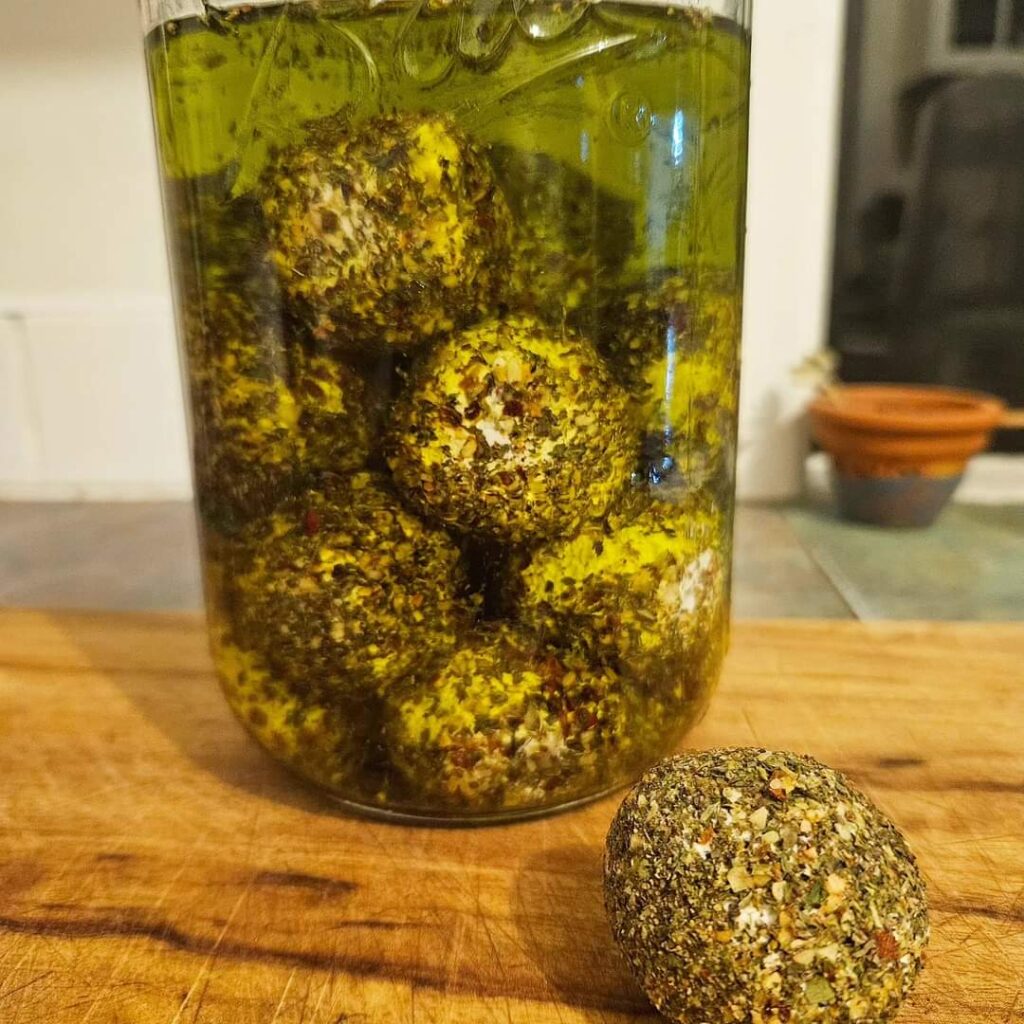
- You can turn it into dream cheese. Shape your cheese into balls and roll them in whatever spices you like. I have rolled mine in Italian herbs which was delicious. Place the balls gently in a container and fill with olive oil to preserve them.
- Pop them into the fridge to store them. Stores for about a year this way. When you want to use one just take the container out of the fridge so it dethaws a bit and take a ball out. They are extremely delicious on bagels or with crackers!
What To Do With The Extra Whey
If you ever make cheese you will always end up with a lot of whey! Don’t waste this extremely healthy by product! Here are a few ways to use up your whey!
- Make a delicious chocolate drink out of it! Probably our favourite way to drink it is adding about 2 tsbp of cacao powder to 1.5 litres or so of whey. We add about 1/4 cup rapadura sugar any sugar should work. 1 tsp of vanilla and blend it all together. Let it cool in the fridge and then drink. My kids love it!
- You can use the whey like you would buttermilk. Add it into waffles, pancakes, or muffin recipes.
- Replace whey with any recipe that calls for water.
- Use it as a stock for soups or stews!
- Add it into smoothies.
- It is also great to give to your animals as it’s very nutritious.
Questions And Answers
Does kefir cheese taste like cream cheese?
Kefir cheese is surprisingly similar to cream cheese in taste and consistency. It can have a tangier taste depending on how long the original milk kefir fermented for and the temperature.
It’s smooth and has a soft cheese consistency. I regularly swap kefir cheese for cream cheese in many recipes with no issues.
How long will kefir cheese keep?
Kefir cheese can last several weeks in the fridge in an airtight container. You will notice a sour rotten smell when it starts to go bad.
How to make kefir cheese less sour?
If you want to make your kefir cheese less sour just make sure you don’t let the milk over ferment with the grains.
The other thing you can do is let your milk kefir do a slower ferment in the fridge or in a cool cupboard, so it comes out thick and not nearly as sour and tangy.

Milk Kefir Cheese
If you find cheese scary milk kefir cheese is a great way to start. It's super easy, delicious and very healthy! You will love this soft tangy cheese!
Ingredients
- 2 litres of fermented milk
- 1 tsp salt (optional)
Instructions
1. Place the fermented milk with kefir grains already removed into a nut milk bag, cheese cloth or very clean pillowcase.
2. Tie the cheesecloth up or tighten the string on the nut bag and hang the bundle over a large pot or bowl. This will allow the whey to strain out leaving your curds in the bag.
3. Let it hang for about 24 to 48 hours. The longer you let it hang the thicker the cheese will be.
4. If you want thicker cheese after 24 hours add a tsp of sea salt and mix it into the kefir cheese. Let it hang a further 24 hours. The salt helps to draw out extra moisture.
5. Take the cheese out of the cloth and season however you like! You can use it as a substitute for any cream cheese recipe, turn it into a dip or turn it into dream cheese which I mentioned in the post above.
6. Place in a container in the fridge and enjoy. If you added salt this helps it last longer in the fridge. It can last a solid week as is or longer as dream cheese.
Notes
Don't' waste the whey which is the liquid that was left at the bottom.
You can use the whey for a variety of things.
- Add into smoothies
- Replace buttermilk recipes with whey
- Use it as a stock for soups and stews.
- Replace the water in recipes with whey
- Turn it into a chocolate drink by adding 2 tbsp cacao powder, 1/4 cup rapadura sugar (any sugar will do) and 1 tsp vanilla. Blend and place in fridge to cool down. So delicious!
- Add it into smoothies!


This sounds delicious!